
Have you ever taken a picture and the colour just didn’t seem right?
It’s likely because your camera was in the wrong white balance setting. DSLRs can be overwhelming at times, they have so many settings. Most of the time you can get away with an Auto White Balance setting but there are times when an auto setting won’t get you the amazing results you’re looking for. This blog post will teach you how to know which kind of light is which and what White Balance to choose.
But first, where do you even find the white balance setting? Take a look at your camera and look for a WB button or White Balance option in your menu system. In order to change the white balance, you need to be in one of the non-automatic modes (Program, Shutter Priority, Aperture Priority, or Manual).
Some of the settings are a bit more obvious than others; daylight for example! But what kind of light bulbs are for which setting?
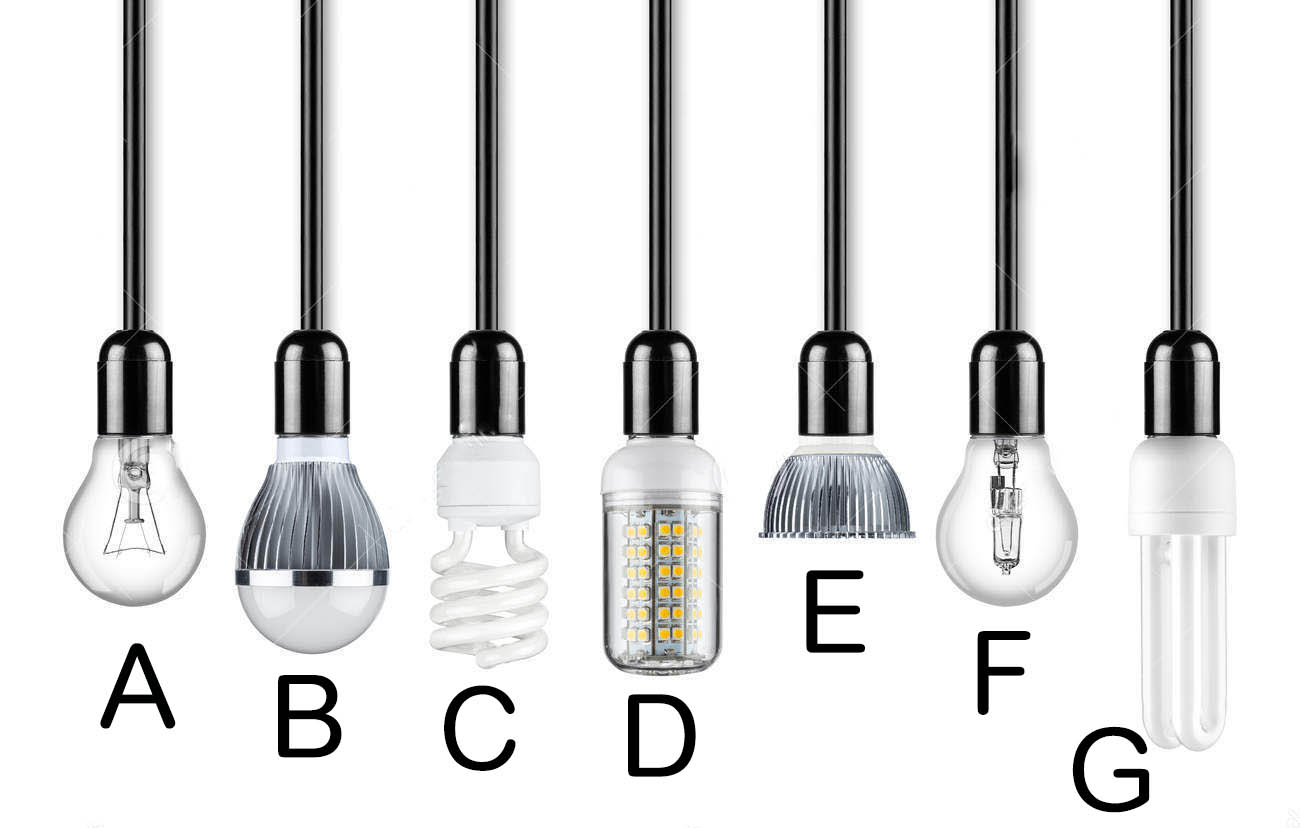
A –Tungsten
B – (LED) Daylight or Flash
C – Fluorescent
D – (LED) Daylight or Flash
E – Tungsten
F – Tungsten
G – Fluorescent
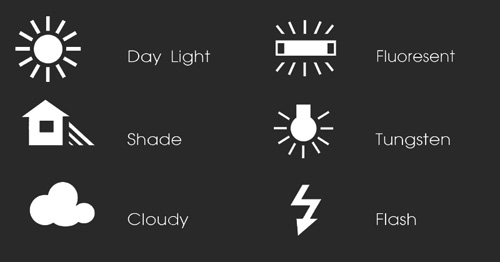
(above) The various icons you’d see in your camera settings for white balance options.
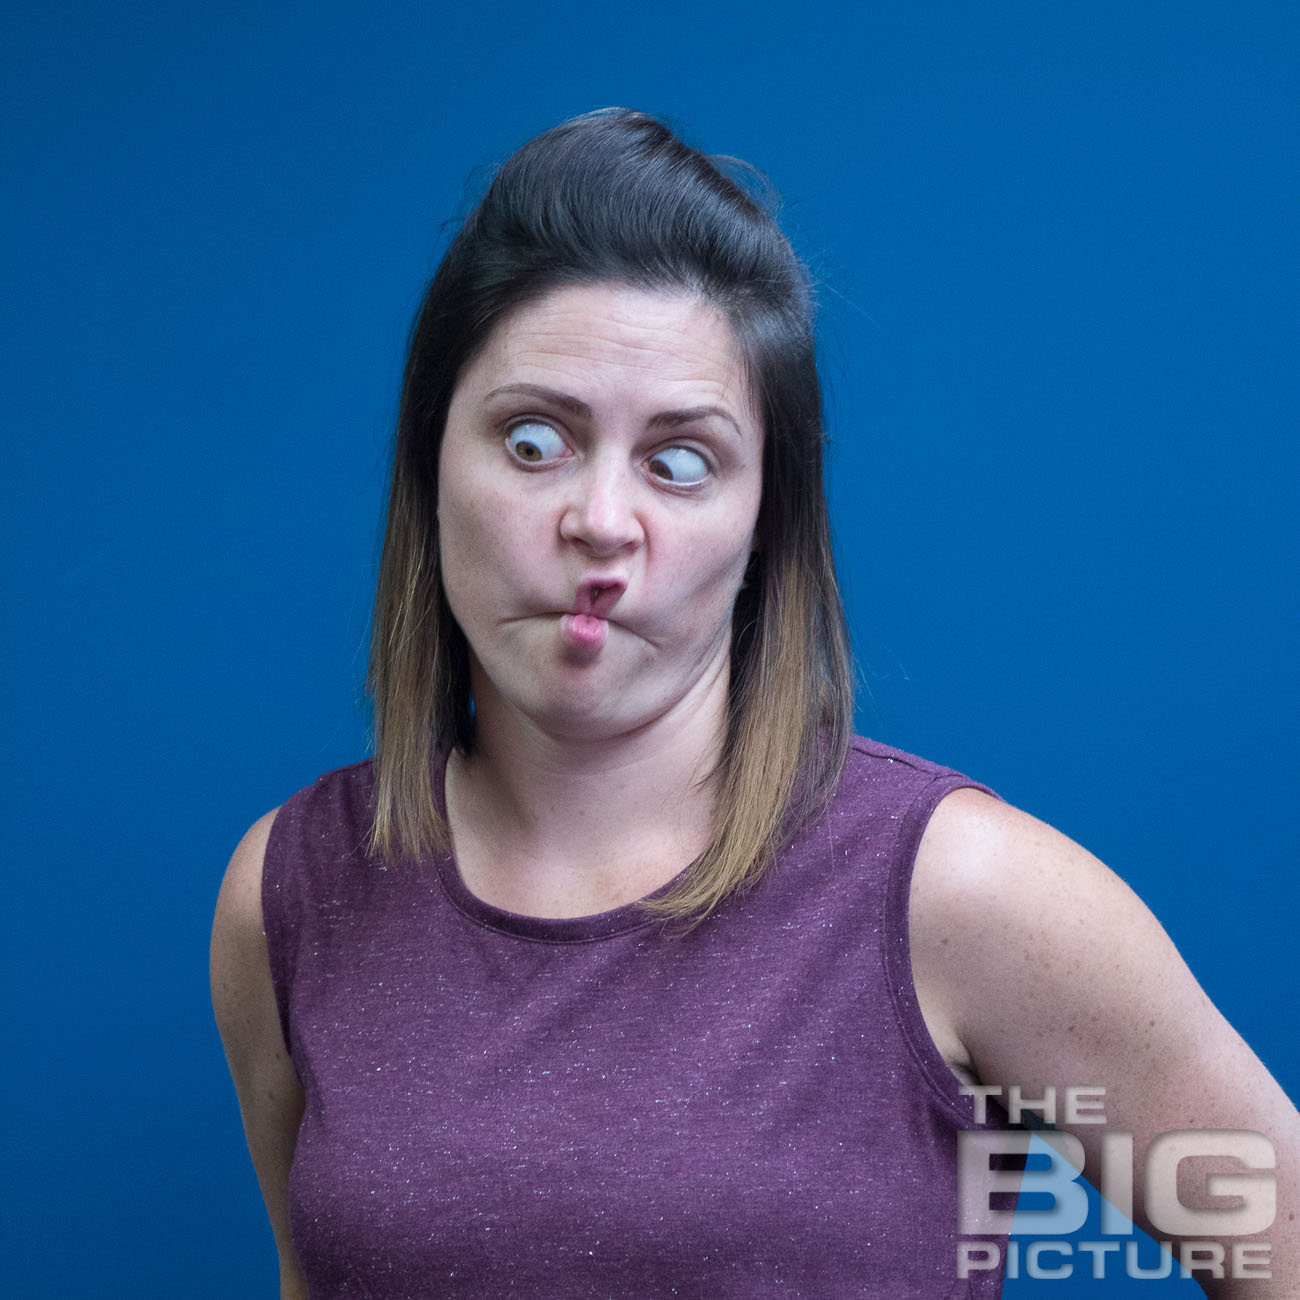
Comparison of White Balances
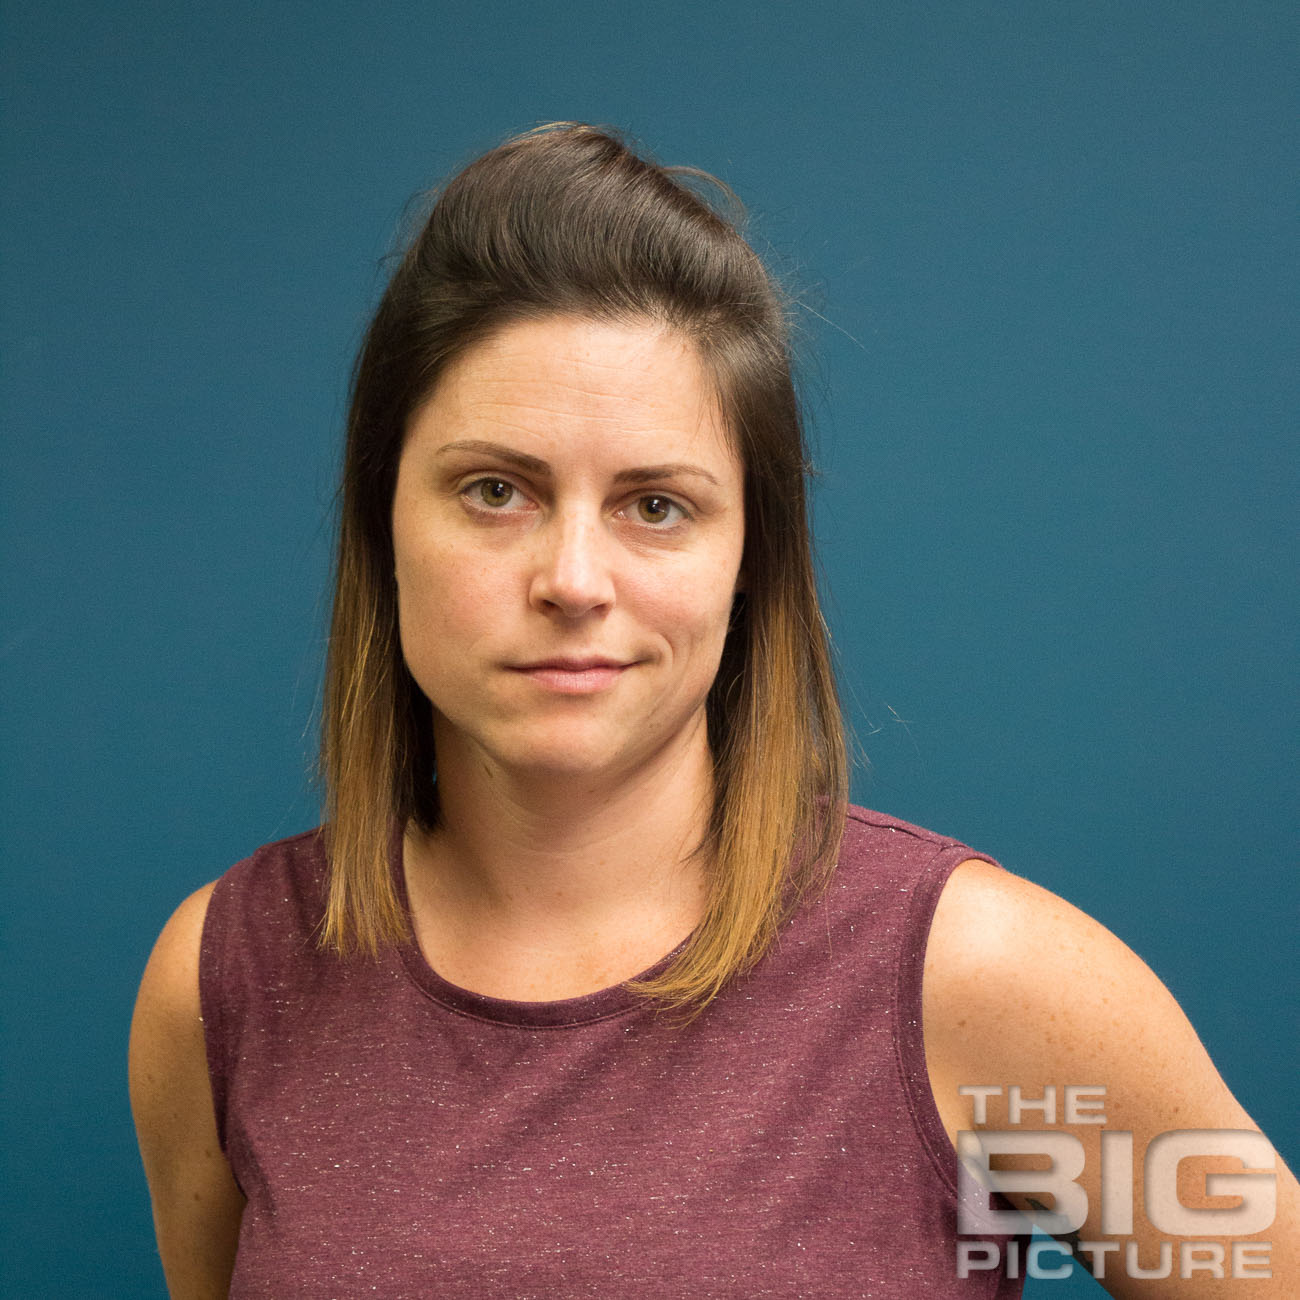
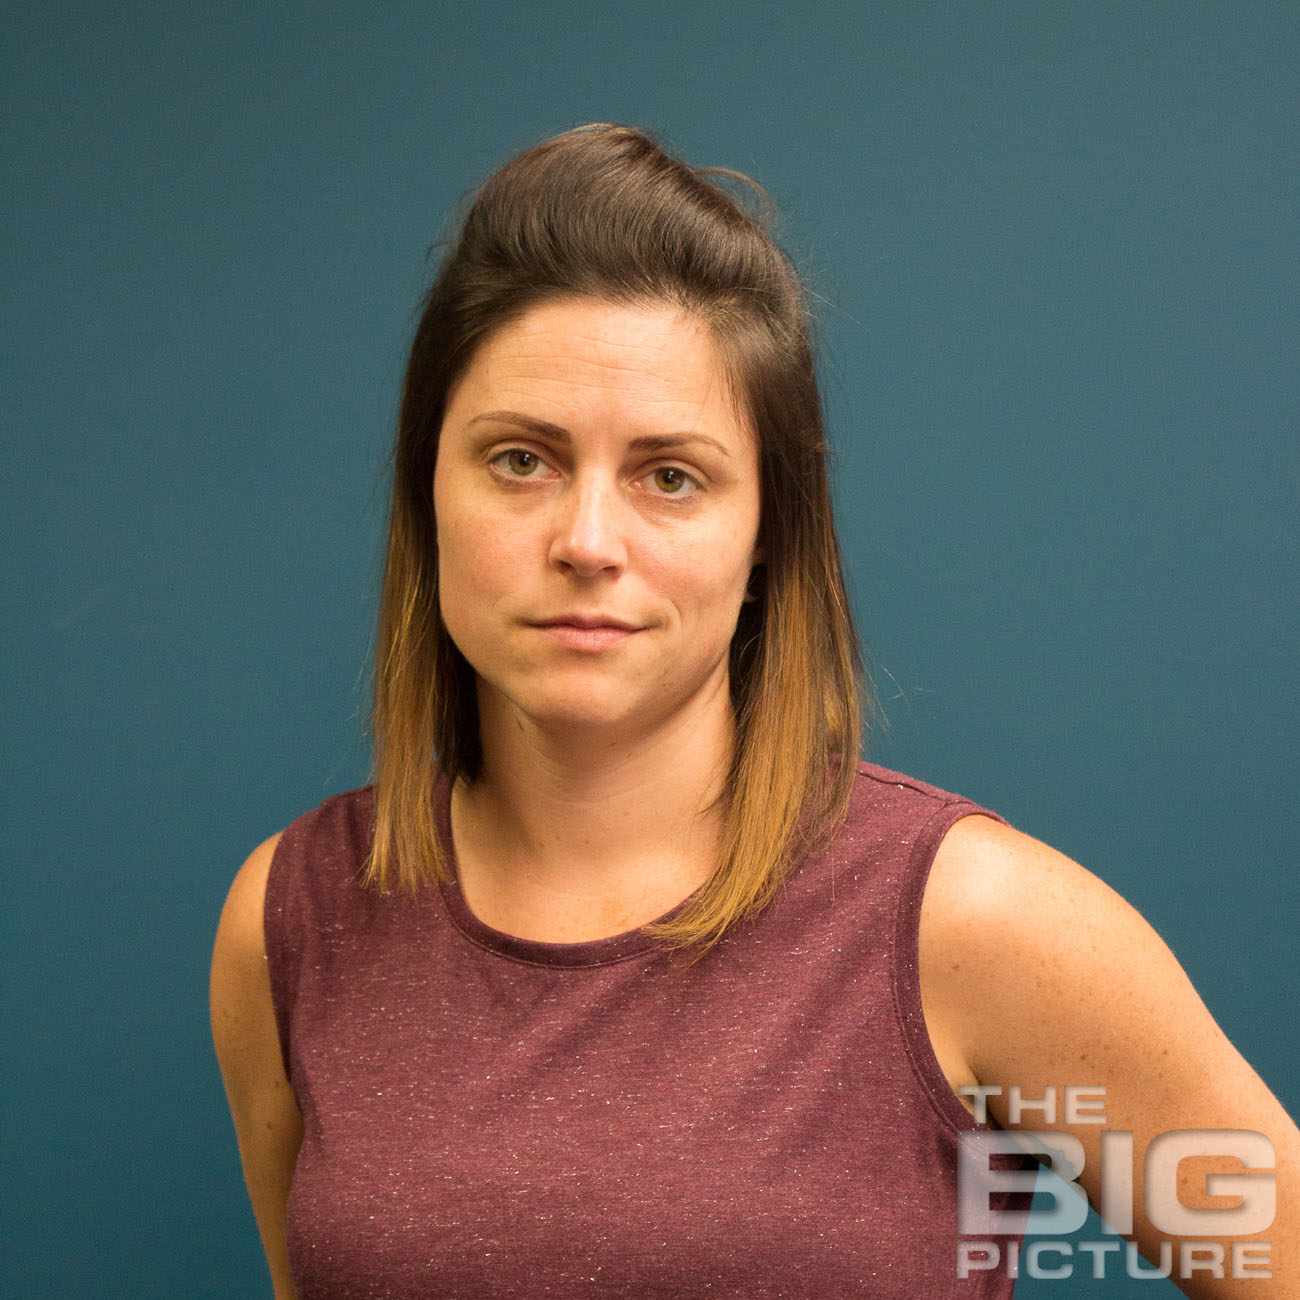
Here we have setup the same lighting condition (standing under fluorescent lights) but changed the white balance setting to show you how having the right (or the wrong) white balance setting can affect the look of your photo.

Fluorescent
This photo was shot under fluorescent lights with the Fluorescent white balance setting
Daylight
This photo is with fluorescent lighting but taken with the camera set to daylight white balance
Flash
This photo is with fluorescent lighting but taken with the camera set to “Flash” white balance
Tungsten
This photo is with fluorescent lighting but taken taken with the white balance in a Tungsten setting. Notice how it’s compensating blue?
Overall, if you look at the 4 photos above, the picture with the fluorescent white balance setting is pretty close to what you’d see with your eye. That’s pretty close to Joelle’s actual skin tone, that’s pretty close to the colour of the background, and that’s pretty close to the colour of Joelle’s shirt.
Now, there is actually a way to get 100% perfect white balance using a custom white balance. In order to do that there is a specific process to go through in order to get everything perfect. We’ve created a short training video that explains exactly how to do it, and you can get that training for free below.
Want to learn how to use a custom white balance?
We've created this short training video to explain how to get the colours completely correct. The training is free, just click the button, enter your info, and get access to the training.
Show me how to use Custom White Balance!